The Aero Road bike is a relatively new concept as it has the platform of a traditional road bike but also incorporates characteristics of a time trial bike. As such this bike the bike excels on the flats, cornering, sprints or any other situation where the terrain is flat to rolling.
The intent of the aero road bike geometry is to reduce drag. The creative elements incorporate by Specialized with its Venge Vias frame to help reduce drag include integrated cockpit, hidden brake calipers, internal cable routing, wing-style handlebar and more.
The athlete’s whose bike is featured the pic went through the entire bike fit process – a process (in a nutshell) that includes measuring the leg, trunk and foot and then comparing those measurements to the geometry of the bike which results in a fit solution. With the solution in hand, it was time to examine the existing conditions of the bike and then start making changes.
It should be noted that the athlete was having issues with the bike and commented that it was not a fun or comfortable bike to ride and that it was difficult to produce power.
Bike Data
- Brand: Specialized
- Model: Venge Vias
- Size: 52cm
- Year: 2017
- Notables: Hiden brake calipers and Specialized Power ARC saddle
Fit Data
- The first step is to check saddle fore/aft which in this case required a rather sizable adjustment. Based upon the athletes hip dismensions he needed to be 55 millimeters from centerline to saddle sweet spot and instead he had the saddle set at 35 millimeters from the centerline to saddle sweet spot.
- The next step is to check saddle tilt. The tilt was measured at +1 degree measured from the sweet spot of the saddle. Saddle tilt should be neutral or just below neutral so an adjustment was required and resulted in -1.5 degrees.
- Fit Fact: A saddle with a tilt greater then -3 degrees can cause numb hands and instability.
- The third step is to check Saddle height. The height was extremely high causing the athlete both to overextend his leg and rock side to side in the saddle (big cause for low power output and sloppy pedal stroke). So I decreased saddle height by 20 millimeters
- The fourth step is to check effective body extension which was correct when measuring to the center of the handlebar. However, the measurement to the hoods was too long due to the bar dimensions (reach) – the integrate and the proprietary system does not allow for an easy solution so I made recommendations and left it as is.
- The fifth was to configure headset spacers and or above horizontal alignment (bar drop). After decreasing the saddle height the resulting bar drop was conducive to the athlete’s current fitness level, flexibility and preference for terrain so no additional modifications were necessary.
- Next, I assessed the hoods and bar angles – in the hoods were correctly positioned but the bar angle was causing then to angle downward resulting in pressure on the wrist so I adjusted the angle by 3 degrees upward and reduced the pressure on the wrist.
- Last I set the athlete’s cleats. In this case, the modification was small but millimeters matter when setting cleats and thus resulted in big changes on the bike. I bought the cleats back towards the heal and inward towards the crank arm which in turn pushes the shoe away from the crank arm and brings the stting position forward in the saddle.
Conclusion
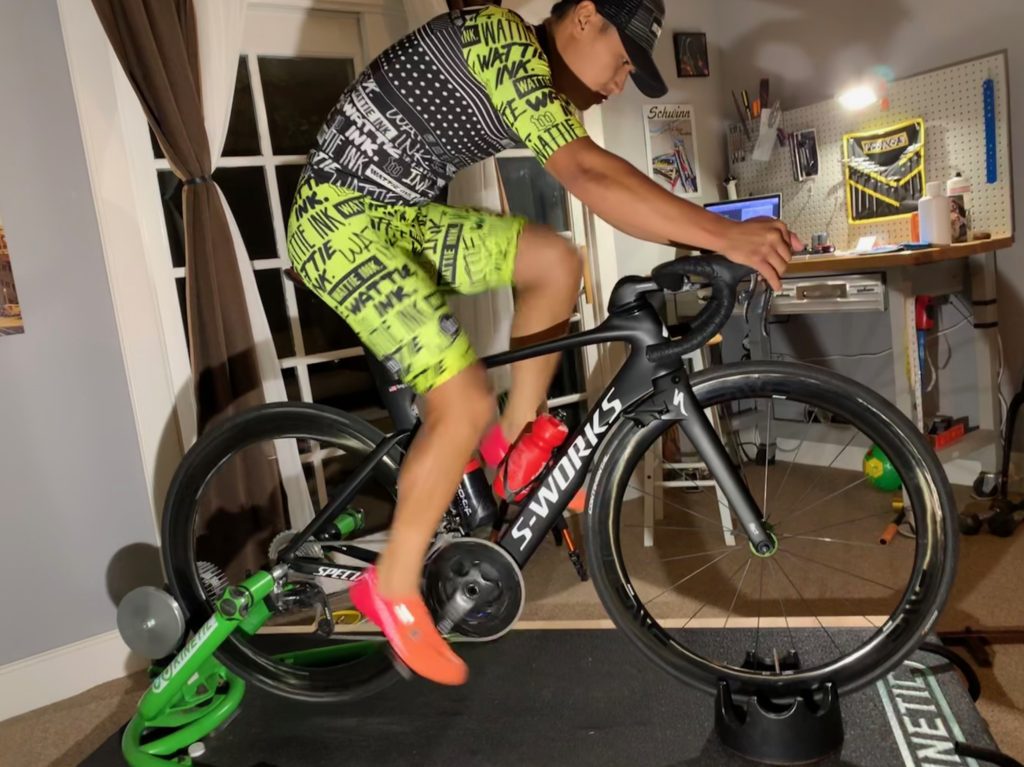
After a long warm-up on the trainer and multiple hard efforts, I was pleased with the athlete’s position on the bike. I asked the athlete for feedback and based on the changes made he felt that the reduced saddle height stopped the hips from rocking and that it was much easier to produce power. The end result of the fit can be seen in the pic below.